Showing posts with label Vegan. Show all posts

Sunday, March 29, 2015

Pico de gallo

For Spring Break this year, Jeff, Noah and I went with the Campbell family to Cancun.  I ate pico de gallo more than once every day, so when back home, I found myself craving it.

There are many different variations we make  but the base recipe is simple:
  • Chopped tomatoes
  • Chopped onions (green, white, red- any type of onions)
  • Minced garlic
  • Cilantro
  • Lime or lemon juice
  • salt to taste

For those of us that prefer it spicy, we add sweet and hot peppers, and a little cumin & chili powder.


The boys will often have a meal of vegan bean tostadas and dip them in pico with some sliced avocado.


And it gets really festive when
we use these cute plates Jeff got for me!  (they are plastic-- he got them at Sams and they are our favorites now because all of our ceramic dishes were chipping and these look great but don't chip).


Sunday, February 1, 2015

Roasted Veggies

I was introduced to roasted brussel sprouts and sweet potatoes from a friend (thanks Jerrilyn).  Before that, I had NO IDEA how much I like brussel sprouts!

I googled roasted vegetables and found a plethora of recipes, including all kinds of veggies.  After I made the first batch, roasted veggies have been a regular for dinner.

It is best to roast veggies that have longer cook times on the same sheet and to separate them from those that cook more quickly.  But often in a hurry, I just cut them all up and roast together.

I take left-overs to work the next day and mix them in my salad.

Veggies that take 40-45 min:

  • carrots
  • potatoes
  • sweet potatoes
  • large brussel sprouts
  • onions
  • butternut squash
  • garlic cloves
Veggies that take around 20-30 min or less:
  • small brussel sprouts
  • tomatoes
  • sweet peppers
  • zucchini or yellow squash
  • leeks
  • brocolli & cauliflower
  • mushrooms

Instructions:
  1. Preheat oven to 450 degrees
  2. Cut up veggies into small pieces 
  3. Keep the veggies with same cooking times together
  4. Toss them with olive oil, melted butter or coconut butter
  5. Add seasonings (our favorites are sea salt, pepper, thyme, garlic and fresh herbs like rosemary and basil)
  6. Mix altogether
  7. Spread on a baking sheet (use baking paper or non-stick spray)
  8. Roast the veggies, uncovered for 30-45 min, stirring occasionally
  9. Enjoy!!!


Monday, March 17, 2014

Vegan Shepherd's Pie

We had a St. Patty's Day potluck at the office.  In researching what dish I was going to make (I took "Corn O'Brien- made without bacon), I saw many pictures of Shepherd's pie.

I have fond memories of eating Shepherd's pie when growing up.  So, I was determined to make it for my family... minus the beef.

I didn't realize all the different ways there are to make Shepherd's pie... the kind my Mom made included green beans, mashed potatoes and ground beef.  So, that is what I did too.

I used this Veggie ground pictured below for the "beef".  I used a little bbq sauce for flavor.  It really turned out well... the boys LOVED it!


The bottom was a layer of mashed potatoes (using Silk creamer, salt, garlic & partial skin-on red potatoes).  Next layer was green beans.  Third layer was our seasoned "meat".  The top was another layer of mashed potatoes.  Baked it in the oven, covered, on 350 until warm.  In the last few minutes I took off the lid to brown the top of the potatoes.  Delicious!

Sunday, February 9, 2014

Salad in a jar.... vacuum sealed to extend freshness

Sometimes we have time to get really organized for the week by preparing quick, go-to salads.  And sometimes, we even have time to make specialized salads for each family member, since we all have different favorites (Taylor enjoys using his label-maker).

All you need are some mason jars, a push-pin tack, some electrical tape and an inexpensive ziplock vacuum sealer and you can vacuum seal salads that easily last for a week in the fridge.

The first step is to make a hole in the lid of the mason jar.


Next, you lightly place the electrical tape over the hole, then screw the lid on the filled mason jar and pump the vacuum sealer until the air is removed and you've sealed the lid.  We always test it to make sure it has sealed.


The best way to fill the jars is with the hardest veggies on the bottom-- examples: carrots, broccoli, cauliflower, celery.

Next comes the softer veggies like sweet peppers, cucumbers, onions.

The greens will always go on top.

If we are going to eat the salads at home, we often put dressing in the bottom, followed by broccoli, cauliflower & carrots, which marinates them until it's time to eat.  Just shake the jar well to mix the dressing and you can eat your salad right out of the jar!

But, if using the salads to prepare lunch containers, we take dressing with us and add it later.


Sunday, January 12, 2014

2014 Juice plan

It's hard to get back into a habit!  But, I was determined that our family needed to add fresh juice back into our diet on a regular basis.

With our schedules, it is not realistic for us to juice DAILY.  So, we make large batches of juice on the weekend and freeze it.  Each morning, I thaw out an 8oz container for Jeff and the boys for their breakfast, and I take a 12-16 oz container with ginger in my juice to work each day.

Since there are 5 of us, we have to make at least 2 gallons + of juice each weekend to get us through the week.  One weekend we made almost 4 gallons and didn't juice again for 2 weeks!

It is definitely a "family affair"!  Every person in the family pitches in to help.  We have a huge, Gatorade drink cooler (note the irony) that has a spout to distribute into the individual plastic containers.

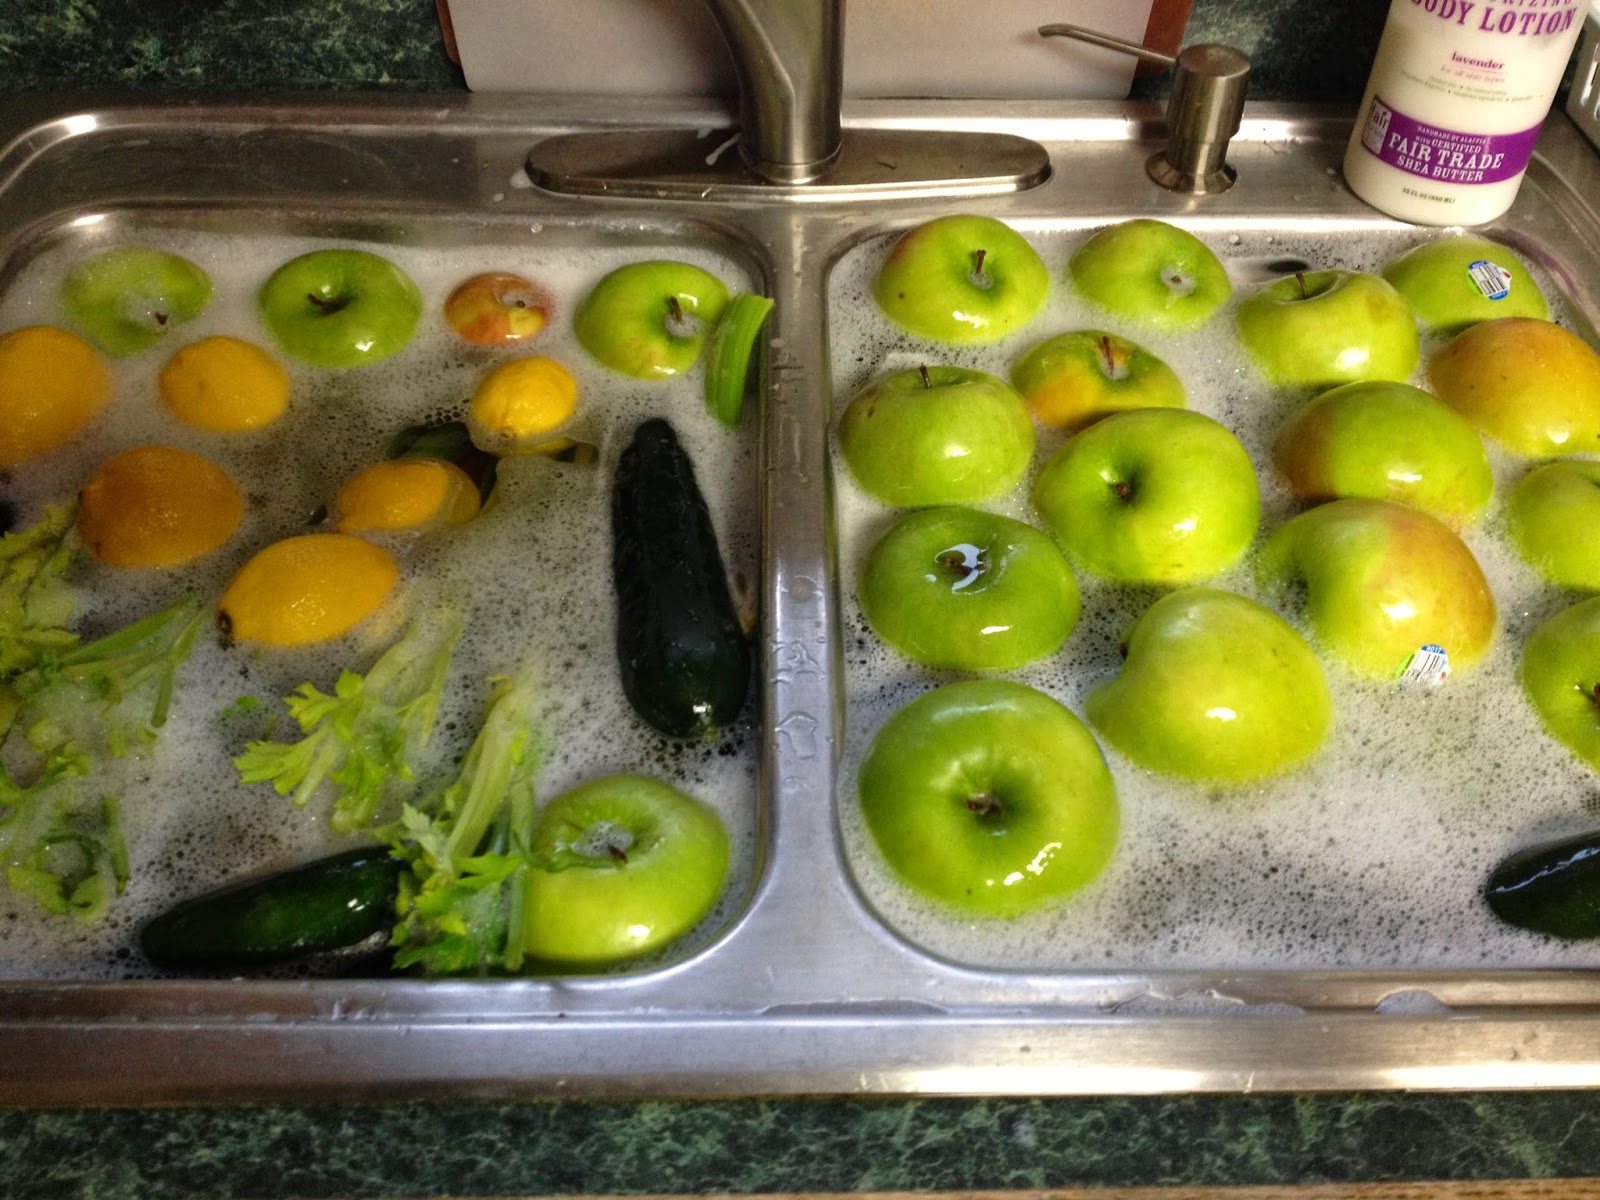
We soak the veggies first... it takes 2 sinks full.


Our recipe is often the following:
  • 4 or 5 bags of apples
  • 3 or 4 heads of celery
  • 2 bunches of kale
  • 6 -8 cucumbers
  • half a bag of lemons
  • 5lb bag of carrots
  • 2 or 3 beets

Jeff found these plastic containers online.  The large bottles with the green lids designate "ginger" is in the juice... therefore, they are Mom's... because no one else likes my ginger juice!


Many people ask what type of juice I have and what they should buy.  We have had a variety of juicers.  The Champion is long lasting, but it is more expensive and has a narrow opening for the fruits/veggies.  We used it for years and loved it.  But, Jeff found this inexpensive juicer on sale for less than $50 and we really like it.  It has a large opening for fruits/veggies and is super easy cleanup.  Probably won't get the longevity of the Champion, but it was a third the price.

My advice is to find a juicer that has very easy cleanup... otherwise that becomes a barrier to using it.

Wednesday, May 12, 2010

2 Easy Soups: Split Pea and Miso Soup

We eat more cooked soups in cooler weather (gazpacho is a cool summer favorite, but not until July when the tomatoes come on strong) and I often default to them when I don't have time for a lot of mealtime "prep". 
Split Pea and Miso soup are 2 of my default quick dinner additions.

Split Pea Soup:
Split pea soup is an in-expensive crowd-pleaser in our home.  It requires little energy or time to make (not including cooking time which is an hour or two depending on how much you are making).  Add a few raw veggies for dippers and you have yourself a filling, nutritious meal!

Ingredients:
  1. Dry split peas
  2. 2 or 3 large carrots
  3. garlic and sea salt
If you have time, pre-soaking the peas aids with digestions (less gas).  Otherwise, put dry peas in a pot with water level about 4 to 5 inches above peas. 

Chop carrots into small wedges-- use a food processor for quicker chopping.

Cook on high for a few minutes then reduce to a slow boil.  I set the kitchen alarm for about 40 min. to remind me to check the soup.  You may need to add water.  When it's the tenderness and consistency you like, add sea salt and garlic to taste. 

We usually don't have left-overs and the boys always get full from this meal!
Miso Soup:
Another soup that is a favorite when we go out to eat at an Asian or Sushi restaurant is Miso soup.
Miso is available at any health food store and has gained such mainstream popularity, it may even be offered in high-end grocery stores or grocery stores that acclimate towards healthy offerings or with a high Asian shopper base.  Below is the brand I often purchase ... it's about 5 dollars and change for a 13oz container and half of the container makes a big pot of soup that feeds all 3 boys.
Miso Soup Ingredients:

  • Miso
  • Water
  • Bragg's Liquid Aminos
  • Tamari
  • Wakame to sprinkle in (optional)
  • Tofu chunks (optional)


Confession time here... I have made this many many times and never measured anything, so I don't know exact proportions!
I fill a pot up with the amount of water I think the boys will need to get full and plop half the container of Miso in and squirt in Bragg's and Tamari and then mix it all up. The Miso will need to be worked through with a fork because it comes condensed- much like bouillon cubes need to worked to mix with the water.   
I am not a fan of this soup, so I don't trust myself to be the taster.  I have the boys taste it and tell me if it needs anything.  So far, I've guessed correctly and they've always said it was great, so I haven't had to adjust. It takes only minutes to warm up and serve.
In their bowls, I sprinkle some Wakame and pour the soup over it.  I serve it with either a green salad, seaweed salad or some left-overs (see below).
Miso soup with rice and salad
Add a seaweed salad and "walla"... you've turned your kitchen into an Asian restaurant. (see previous entry on making seaweed salad)